Cycling: The Beginners Guide!
Welcome to our Cycling Beginners Guide! Whether you’re just starting out and looking to get into cycling, or if you’re looking for tips in order to teach others you can find all of that right here. Moreover, if you’re a confident cyclist already but just want some additional suggestions, read on for more…


Ensure your tyres are pumped up.
So, you have found the bicycle you like the look of and are looking forward to your first ride. The first step therefore, comes before setting out and it is to ensure both the tyres are fully inflated.
Firstly, how inflated you have them comes down to personal preference at a certain point. Because of this, some cyclists will prefer a rock solid, fully inflated tyre to allow the tyre to glide along the road, allowing for a better roll as there is less connection to the road.
Alternatively, not having your tyre fully inflated allows for a bit of drag and will increase the amount of grip on the road – because of this it can be helpful when riding during slippy wet or icy conditions.
Unsure on what amount of air to put into your inner tube/tyre?
Most manufactures have made it easier for you! Along the side of the tyre wall, there will be guide of how much air to put into your tyre.
As you can see in this image, this tyre allows for a maximum of 3.5 to 6.0 bar or 50 to 85 PSI.


Make sure your saddle is at the correct height.
Secondly, in the cycling beginners guide, is to correctly adjust your seat post and saddle to the right height for you.
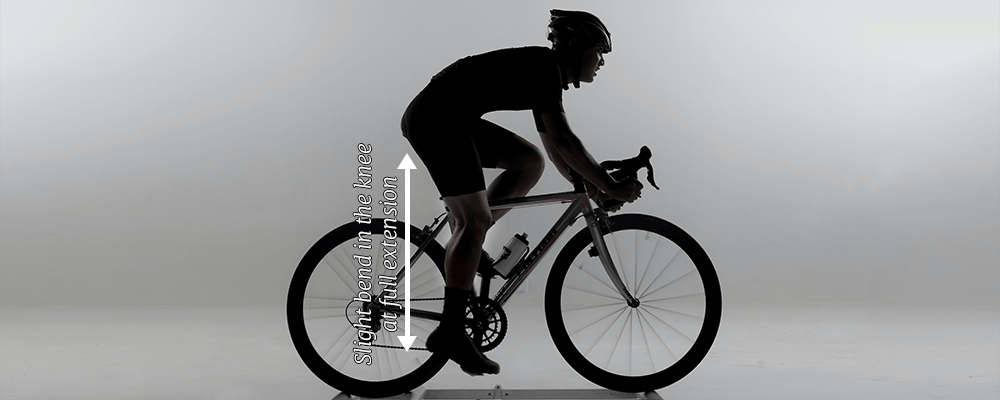
Saddles that are too low will make for an uncomfortable ride and doesn’t allow for optimum leg power. So therefore, a saddle too high can lead to a leg strain and a potential to lose control of your bike.
As a rule of thumb, to get the correct height, sit on your saddle. Put the pedal in the lowest position, nearest the ground. With your foot on the pedal, there should be a slight bend in your knee, if your leg is fully extended the saddle needs to be lowered slightly. Keep trying with this and you should find the best height for you with a little trial and error.

Unsure on how to adjust the height of your seat post/saddle?
Your bike will come with two options to clamp the seat post in place, either Quick Release or Allen Key.
Allen Key Clamps require a Allen Key tool to loosen and tighten the clamp, and this means you will have to carry one with you if you wanted to adjust the height on the move. Because of this, it also makes your saddle and seat-post more protected from thieves.
On the other hand, Quick Release Clamps don’t require a tool to loosen or tighten and can be done easily whilst out and about.
Therefore, the choice is yours dependant on your preference.


Quick Release Clamp
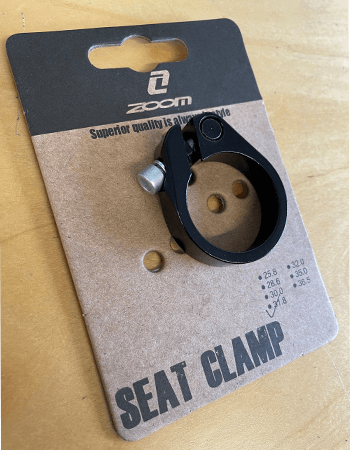

Allen Key Clamp
Invest in a good lock.
In addition, you will want to invest into a decent lock to keep your bicycle protected whilst out on a ride. Even if you’re just nipping into a shop on your route, we heavily suggest locking your bike up somewhere safe.
With Locks, most of the time you get what you pay for – so we encourage you to go for good quality rather than going for the cheapest option when it comes to Locks.
The popular options on the market are Chain Locks, U-Locks or Coiled Locks. These can either be Combination/Coded Locks or Keyed. To conclude, they all have pros and cons, and because of this, it comes down to personal preference and where you’re planning to be riding
Therefore, to see our range of Locks, see below:
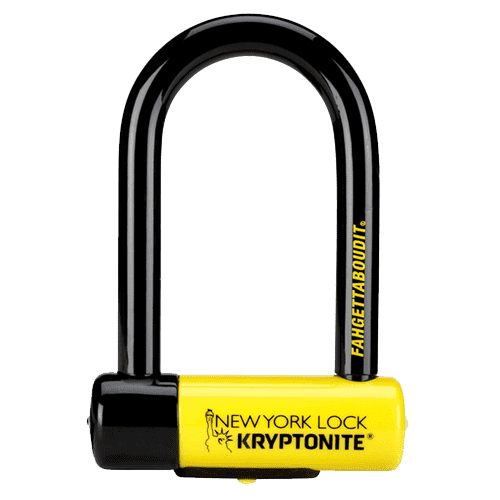

The U-Lock, sometimes known as a D-Lock too.
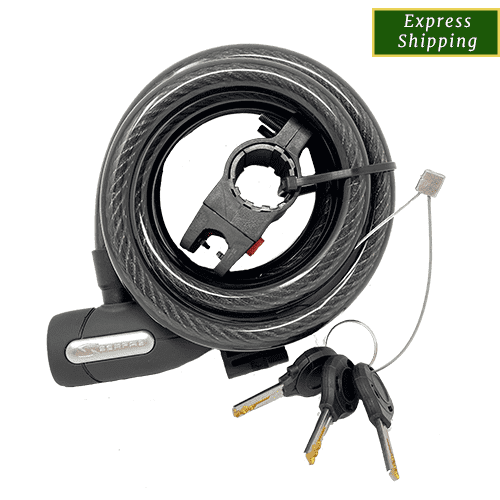

The Coiled Keyed Lock.
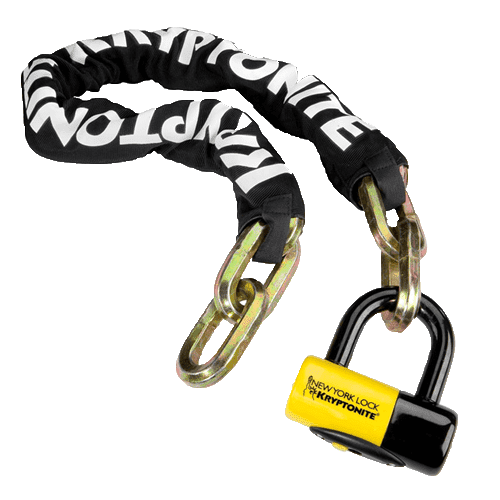

The Chain Lock.
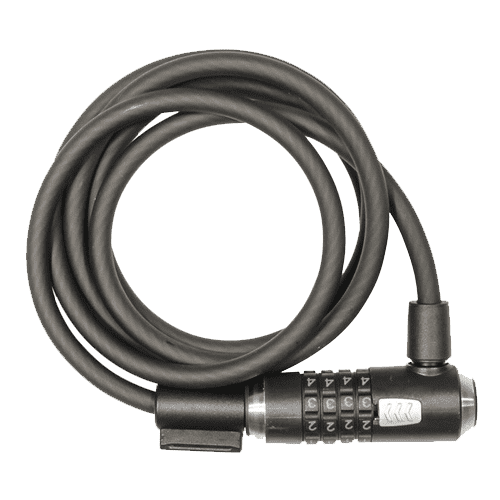

The Coiled Combo Lock.
Take food, water and supplements with you.
Before heading out on your first ride, we encourage you to take food, water and even supplements too if you wish. Because, if you’re just starting out on short routes, you will quickly be out of breath and fatigued.
It’s important to take regular breaks if you’re feeling tired and restock the body with food and drink. Anything with plenty of energy is recommended, this could be fruit, chocolate or energy bars. Water is always the best choice for re-hydration. Most supplement companies sell ‘Energy Tablets’ that can be dissolved into water to give not only a energy boost but also a bit of flavour to your drink.
See below for our Storage and Bags range so you can carry this food and drink and also our Bottles range.
*Don’t worry, you can always come back to the Cycling Beginners Guide if you click off this page.


Invest in good Lights.
Just like Locks, you’ll want to invest in a great set of Lights as well. This includes having a Front and Rear Light.
Even if you aren’t necessarily planning on riding in the dark. You never know what emergencies may happen whilst you’re out that can delay you until it gets dark. As a result, we suggest for you to keep a Front and Rear Light in your bag at all times.
Most modern Lights are USB Rechargeable so there’s no need to carry extra batteries with you. As long as you remember to keep your Lights charged up for next time. Alternatively, if you prefer a Battery Powered Light they are still readily available on the market.
You’ll want to attach your Front Light to the Handlebars or the Stem. The Rear Light can be attached to the Seat Stays or Seat Post. Modern Lights will come with a simple elasticated or plastic bracket to attach them to your bike.
To read more about Bicycle Lights, see our Bicycle Lights Buying Guide right here!


Keep emergency tools, spare parts with you.
We would highly suggest to have a saddle bag or rucksack on your ride with some emergency tools and spare parts in. It’s also recommended to put some cash in our saddlebags whilst out too just in case you need some refreshments.
A multi-tool is a handy bit of kit for this scenario as it is pocket sized so won’t take up much room in your saddle bag. It also contains most of the tools you will need in an emergency such as screwdrivers, torq fitments and sometimes even tyre levers. See our Tools range below:
Carrying spare parts may also be a good idea. Smaller things that you can fit in your saddlebag such as Inner Tubes in the likely case of a puncture whilst out riding.
On longer journeys or particularly ones with rough terrain it may be advisable to carry a spare Folding Tyre in case of a nasty tear in your current one. You will probably need a larger bag or rucksack if you wanted to do this.
It’s always a good idea to keep a pump with you, so you can inflate or deflate your tyres dependant on your terrain. Again, the amount of air in your tyres can highly impact both the grip and rolling resistance. Moreover, some pumps on the market will be sold with a bracket, this can be fitted to your bicycle frame which saves you having to carry it.
*Don’t worry, you can always come back to the Cycling Beginners Guide if you click off this page.


Dress correctly for the circumstances.
Check the weather before heading out on your ride! Especially if you live in the UK – one second it can look lovely and sunny and the next it can be pouring it down. Sometimes, although it looks warm and bright from inside, when you leave the house it can be bitterly cold.
We would always suggest taking an extra layer or two with you in a larger saddlebag or rucksack just in case the weather changes its mind. Above all, having a thin waterproof jacket takes up little room in a bag and can be a genuine life-saver when the time comes.
Dependant on the time of year, what you should wear completely changes. Therefore, for more information on cycling in summer, read our Cycling in Summer Guide. Alternatively, for more information on cycling in winter, see our Cycling in Winter Guide.
*Don’t worry, you can always come back to the Cycling Beginners Guide if you click off this page.


Build up confidence on your bike and find riding buddies.
The most important thing and what comes above all whilst your getting to grips with cycling is to enjoy yourself! After all, if you’re not having fun, you’re not doing it right!
Sometimes this may be down to you feeling uneasy or unconfident about certain situations. Especially road cycling, for instance, it can be daunting to get onto the roads for the first time around both pedestrians and cars. Furthermore, the best tip is to take it steady and ease into it. Little and often rides can quickly build up confidence however, and aiming to push yourself a little further each time. As a result, after a short while you’ll be as confident on two wheels as you are on two legs!


Moreover, another top tip to get the most of your rides is to try and find cycling buddies. Likewise, maybe a friend or family member is into cycling that you weren’t aware of for instance. Reach out to people you know if you’re looking for a road buddy. Cycling with a friend can allow you to push yourself a little more of course, and because of this, can make you feel a bit more confident as a new cyclist.
If you’re struggling to convince a friend or family member to come out on a cycle with you, there are plenty of like-minded induvials across social media just waiting to welcome you into their group. Or alternatively, look into local cycling groups that will have like-minded cyclists ready to partner up!


Learn to fix a puncture.
In conclusion, it is inevitable, eventually you will get a puncture after enough cycling. Learning to fix your own punctures can be time effective and in addition, cost effective as well. Because of this, carrying a spare inner tube and likewise, some basic tools is recommended. As a matter of fact, usually this is all you will need to get back on the road with a fully inflated tyre.
Reading a quick guide on the internet or watching a quick video on YouTube will tell you everything you know to fix a puncture. In other words, a little bit of practice and before you know it you will be a puncture fixing whiz!
*Come back soon for a ‘OverLive Teaches: How to Fix a Puncture’


